|
This is the second in a series of 12 blog posts on Azure Enterprise Each blog post is accompanied by a video that covers the same content.
|
The Azure Resource Manager (ARM
for short) is the deployment engine behind Azure. It’s actually a whole lot more than
that, but let’s just start with that.
In a nutshell, we can supply it a description of what we want to create (in
a JSON file known as an ARM Template)
and it will go away and provision all the required resources. It does this asynchronously,
and we can check back regularly to see how it’s getting on.
The beauty of ARM is that we can group our resources however we want,
and we can keep the definition of those resources in a single file, or group them
in multiple files, depending on our needs.
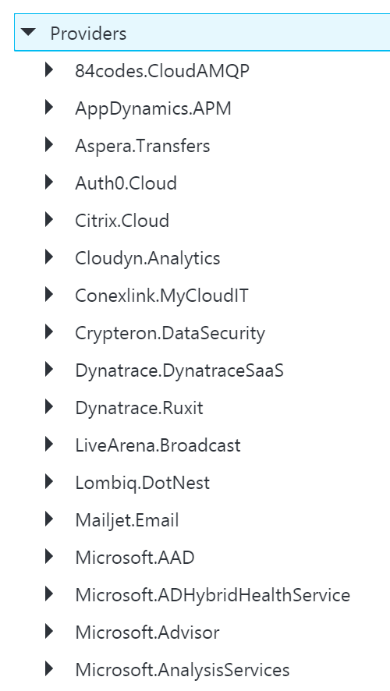
Each resource to be created is represented by a Provider which
uniquely identifies the type of resource being created. For each provider, there is
also an API Version, which specifies which version of the resource to create. For
example, to create a Logic App, you use a provider type of “Microsoft.Logic/workflows”
and an API Version of “2016-06-01” (as at the current date).
Almost every resource in Azure can be created by the ARM engine,
and the goal is to support all resource types. For example, you may want ARM to create:
a virtual machine, the hard disks, a Virtual Network, Traffic Manager, and then kick
off a script that install some software on the VM.
Alternatively, you may use ARM to create some Logic Apps, and API
App, an Azure SQL Database, and an instance of API Management.
The ARM engine also sits behind the Azure Portal: when you provision
a new resource in the portal (e.g. API Management) the portal sends a REST request
to the ARM engine instructing it in what to create.
A Resource Group is a
mechanism for grouping a set of related resources in Azure. Any actions you perform
on that Resource Group then apply to all the contained resources. The Resource Group
also acts as a billing container, allowing you to see the costs of all contained resources.
The main criteria for which resources to group together is that all
the resources share the same deployment lifecycle. Ultimately how you group your resources
is left up to you, but the general rules to follow are:
For example, say you had the following application, called CustomerService:
If all those resources are only used by the same application, then we put them
all in the same Resource Group (called CustomerServiceRG).
That way, if we need to tear down the CustomerServiceRG Resource
Group (e.g. to move it, or during redeploy) we don’t affect any other application.
We can also apply Security (RBAC) and Tagging at the Resource Group level, and have
it affect all the resources in the group.
Now imagine that 6 months later, the Azure SQL Server starts being
used by 2 other applications.
If we *don’t* move the Azure SQL Server to a separate Resource Group, then next
time we tear down the CustomerServiceRG resource
Group, we inadvertently break those other two applications.
|
Note: you’ll notice that when you create
The location for the Resource group is just the location where Resource
In fact, you could have a Resource Group located in North Europe
But for simplicities sake, it’s usually best to keep the Resource
One exception might be for Disaster Recovery situations, where you |
An ARM Template is a JSON file the specifies the resource that the
ARM engine should create.
ARM templates also contains sections to handle parameters that are
passed in, variables used during the execution, and for returning outputs.
There is a whole ARM Template language, containing expressions and functions,
that you can use (along with the JSON you write) to set values and define the resources.
You can read more about the format of an ARM template here,
and see a list of supported expression and functions here.
Almost everything in Azure can be represented via an ARM template:
Logic Apps are defined in ARM Templates, as are Integration Accounts, App Services,
Virtual Machines, Storage Accounts, Service Bus Namespaces/Topics/Subscriptions, etc.
An empty ARM template looks like this:
|
{ “$schema”: “https://schema.management.azure.com/schemas/2015-01-01/deploymentTemplate.json#”, “contentVersion”: “1.0.0.0”, “parameters”: {}, “variables”: {}, “resources”: [], “outputs”: {} } |
Looking at the sections above:
The parameters section
contains a list of parameter objects, defining the values to be passed into the ARM
template (either by an ARM template parameter file, or via a parameter override).
A parameter definition contains:
For example, a parameter that passed in a Logic App name might look
like this:
|
“logicAppName”: { “type”: “string”, “minLength”: 1, “maxLength”: 80, “metadata”: { “description”: “Name of the Logic App.” } |
|
Note: Parameterization is a crucial part |
3.2 Variables
The variables section
contains values that are created at the time of deployment, usually from a combination
of parameter values and expression/function value.
Variables allow you to simplify your template by putting common values
in one place, improving readability and preventing repetition of values.
For example, imagine you have an Integration Account in a Logic App
ARM Template.
You reference that Integration Account using an ID, which is a bit
like a URL to the Azure resource (in fact, it’s a lot like a relative URL to the Azure
resource!).
Suppose you had an Integration Account ID that looked like this:
/subscriptions/aaaaabbbbbbcccccccddddddeeeeeeffff/resourcegroups/integrationaccountresourcegroup/
providers/Microsoft.Logic/integrationAccounts/integrationaccountname
If you needed to reference that Integration Account at multiple places
in your Logic App, you’d have the same value repeated in multiple places.
If you wanted to change the Integration Account ID, you’d have to
change it at each location in the Logic App.
What would be easier, would be to define the Integration Account
ID as a variable:
“variables”: {
“LogicAppIntegrationAccountId”: “/subscriptions/aaaaabbbbbbcccccccddddddeeeeeeffff/resourcegroups/
integrationaccountresourcegroup/providers/Microsoft.Logic/integrationAccounts/integrationaccountname
“
}
And you can then refer to this variable in your ARM Template like
this:
variables(‘LogicAppIntegrationAccountId’)
Going one step further, you could parameterize the variable, so that
the value came partly from expressions, and partly from passed in parameter values:
|
“variables”: {
“LogicAppIntegrationAccountId”: “[concat(subscription().id,’/resourcegroups/’,parameters(‘integrationAccountResourceGroupName’), }, |
In the example, above, we are assuming that the Integration Account
is in the same subscription as the ARM template we’re going to be deploying, and we
pass in the name of the Integration Account and the Resource Group it is in.
The resources section
contains an array of resource objects defining the Azure resources we want the ARM
engine to create.
Each Resource object follows a standard format:
|
{ “name”: “”, “type”: “”, “location”: “”, “tags”: {}, “apiVersion”: “2016-06-01”, “properties”: {}, “dependsOn”: [] } |
The values above are:
|
Section Name |
Description |
|
Name |
Name of the resource being created |
|
Type |
Name of the provider to use for this type of resource e.g. Microsoft.Logic/workflows
Note: provider names are grouped under |
|
Location |
The region the resource should be deployed in. Note: |
|
Tags |
Contains metadata for the resource e.g. for a logic app, the displayName value |
|
API Version |
The specific version of the resource you want to create. API Version |
|
Properties |
The properties for the resource. This is where the actual resource |
|
Depends On |
An array of resource name or IDs that this resource depends on. |
|
Note: You can see a full list of providers
|
The outputs section is
a list of output objects, which are used to return values after the deployment is
complete.
Often, the outputs section is used to return a URL to a resource,
or a connection string (e.g. for a Service Bus Namespace).
A output object definition contains:
For example, an output that returns the Connection String for a newly
created Service Bus Namespace might look like this:
|
“NamespaceConnectionString”: { “type”: “string”, “value”: “[listkeys(variables(‘authRuleResourceId’), variables(‘sbVersion’)).primaryConnectionString]” } |
An ARM Template Parameter File provides an easy way to group all
the parameters required for an ARM template into one place.
The Parameter file is a JSON file that contains at least one parameter
definition for each required parameter in the corresponding ARM Template.
There is no actual relationship between a parameter file and an ARM
template: you could use one parameter file for multiple ARM Template, if the parameter
names were the same.
A parameter file looks like this:
|
{ “$schema”: “https://schema.management.azure.com/schemas/2015-01-01/deploymentParameters.json#”, “contentVersion”: “1.0.0.0”, “parameters”: { “logicAppName”: { “value”: null } } } |
You can have multiple parameter files for a single ARM Template,
with each parameter files containing the values for a given environment (e.g. Dev,
Test, UAT, Production).
5.
Deploying ARM Templates
There are multiple ways to deploy an ARM template: via the Portal, via the Resource
Explorer web site (https://resources.azure.com/),
via PowerShell, and directly via the ARM REST API.
To deploy an ARM Template using PowerShell, you use the New-AzureRmResourceGroupDpeloyment cmdlet:
|
New-AzureRmResourceGroupDeployment -Name DeploymentName ` -ResourceGroupName ResourceGroupName `
-TemplateFile ARMTemplateFile -TemplateParameterFile ParameterFile ` |
When you execute this cmdlet, you’ll get back a Tracking ID you can
use to check the deployment status: this is because the deployment is asynchronous.
An ARM Template can only be deployed to a single Resource Group –
you can’t have an ARM Template that spans Resource Groups.
However, you *can* have multiple ARM templates that all deploy to
the same Resource Group: this allows you to separate resources into separate ARM templates
by resource type, for example. You could then have all your Logic Apps in one ARM
template, Storage Accounts in another, etc.
ARM Templates can be deployed in one of two modes:
Incremental mode is what allows us to separate resources into multiple
ARM Templates.
6.
Obtaining ARM Template Samples
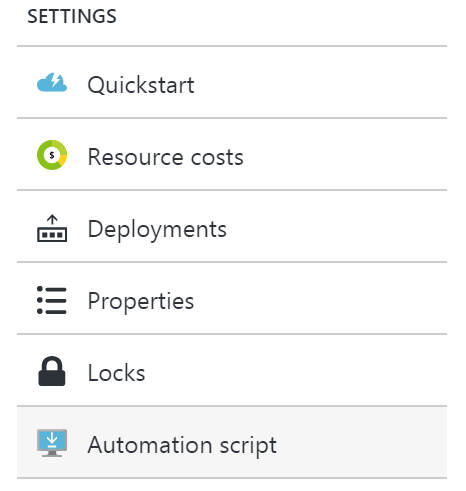
ARM templates can be obtained in several ways:
As an integration developer, it’s important that you learn how to
author ARM templates: not all resources (in fact very few) have a visual designer.
Instead, you either need to create your resources in the Portal and export the ARM
Template; or you need to manually create the ARM Template in Visual Studio.
The best option is to have a library of ARM templates which you can
then modify to suit your needs.
7.
Further Reading
How to author an ARM template:
https://docs.microsoft.com/en-us/azure/azure-resource-manager/resource-group-authoring-templates
ARM Template expression and functions:
https://docs.microsoft.com/en-us/azure/azure-resource-manager/resource-group-template-functions